
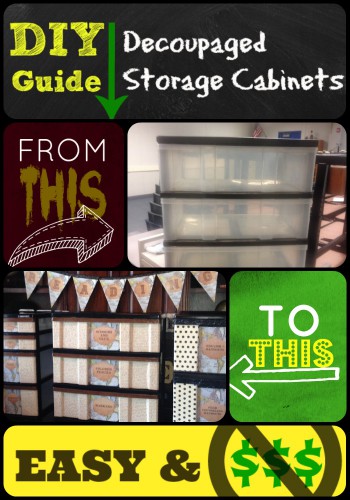
In my last post, I told the story of my first classroom “trash to treasure experience” and what it resulted in, which were these ahhh-mazingly fun and functional (I might be just a tad biased) plastic storage cabinets:


 Now, I know you are going to find this hard to believe but these were old, dusty (that’s putting it lightly), plastic storage cabinets that were left in my new classroom (which I’m not able to move in to yet) by the last teacher. Just so you can comprehend the “trash to treasure” transformation that went down in my garage today, here are a few pictures of them in my classroom before I got my hands on them:


 This project took me about 6 hours in total (but I spent a lot of time waiting for things to dry) and it cost me $0…. Yes, it cost me NOTHING because I had leftover scrapbooking paper and Mod Podge from my projects that I’ve done over the past few days!
Without further ado, here are the simple directions to make these “bad boys” a reality in your home or classroom:
Materials Needed:
1 (or multiple) plastic storage bins of any shape, size, condition, etc.
1 Bottle of “Mod Podge” or the equivalent
- I used the “Gloss” Mod Podge for this project because I wanted the labels to shine bright :)
1 Medium-sized paint brush
- (preferably a “cheapy” because it might be done after this project)
Assorted colors/patterns of scrapbooking paper
- I just went to Michael’s and Joann’s (both large craft stores) this week and bought a ton of different scrapbook paper styles that coordinated well with each other!
A label or whatever you’d like to affix to the front of the storage cabinet/bin/drawer
- I will explain my labels towards the end of this guide!
And then the basic crafting supplies:
- Pencil, ruler and scissors!
Directions for awesome-ly, fantastic decoupaged storage cabinets:
1. Clean the inside and outside of the storage cabinet with an all-purpose cleaner and dry it well. (I used good ol’ Windex and it worked like a charm.
2. Plan your attack. Choose the scrapbooking paper you want to use and what areas of the storage cabinet you want to use it on. On all three of my cabinets, I choose: one decorative pattern for either side of the front panel, a printout from my computer of a vintage map and custom label (download my personal, editable PowerPoint file for your cabinets here: TravelOrganizerLabels) and a coordinating solid color for the handle.
3. Measure each area that you wish to decoupage. You need to be as precise as possible and be sure to account for “mountains” and “valleys” on your storage cabinet. They require extra length or height to be added to your measurement.
4. Based on your measurements, cut the appropriate sized piece from the paper you wish to use. I measure and draw my “cutting lines” on the back so there aren’t any visible pencil marks on the finished product.
5. Place the pre-cut piece of paper on the area that you plan on decoupaging it to and make sure it fits appropriately. Sometimes you will have to make a revision or two to your initial template.
6. Open your “Mod Podge” and give it a good stir.
7. Apply a thin (but not too thin) layer of Mod Podge to the area you wish to apply the pre-cut paper. Not enough Mod Podge will result in air bubbles because the paper won’t fully stick to the plastic.
8. Wait until the layer of Mod Podge becomes just a tad “tacky” to the touch. I usually wait about 30-45 seconds after applying it.
9. Lay your piece of paper over the Mod Podge, starting with one end of the paper and using your fingers to smooth it along as you slowly lay the rest of the piece down. This is a crucial step in the process because it will determine if you’re going to have “air bubble” filled storage cabinets or smooth, slick cabinets :)
10. Immediately begin applying another layer of Mod Podge over the piece of paper. Be generous when applying it because the beautiful thing about Mod Podge is that it dries CLEAR. With that being said, after you’ve applied the layer, be sure to smooth it out with your paintbrush so that it appears to be a consistent thickness across the paper. Globs will take a lot longer to dry, and although they will dry clear, they will still visible!
11. Move on to the next area you wish to apply paper to and REPEAT! Yes, besides giving the storage cabinet and hour or two to completely dry, that’s all it takes to make yourself a few awesome, decoupaged storage cabinets!
I would like to invite you leave any questions you may have in the comments. Also, I would love to see or hear about your experience with decoupage – decoupaged ANYTHING! I’m always looking for new ideas to make my home and classroom a more beautiful place!


Leave a Reply